
The DIY route is tempting. You walk through the lighting aisle at a home improvement store, see a boxed kit with 10 path lights and a transformer for a couple hundred dollars, and think you could have your yard lit by the weekend.
And honestly, you could. The question is whether you will be happy with the result six months from now.
This is not a post designed to talk you out of doing things yourself. If you enjoy hands-on projects and want to light a small section of your yard on a budget, DIY can work. But there are real differences between a DIY installation and a professional one, and understanding those differences will help you make the right call for your home.
What You Get With a DIY Kit
Most retail landscape lighting kits include a set of identical fixtures (usually path lights or small spotlights), a length of low voltage cable, and a small transformer that plugs into an outdoor outlet. Some include a timer or photocell.
The fixtures are typically made from plastic or thin stamped aluminum. The LED bulbs inside are serviceable but not high output. The transformer is sized for that specific kit and does not leave much room for expansion.
For the price, you get a functional set of lights that you can install in an afternoon. And for basic tasks like lining a front walkway or adding a few accent lights to a garden bed, that can be enough.
But the limitations show up quickly.
Where DIY Starts to Fall Short
Design
A kit gives you identical fixtures and leaves the design up to you. Where should they go? How far apart? What angle? Which features of your home should you highlight, and which should stay in shadow?
Most homeowners default to the obvious: line the walkway with evenly spaced lights and point a spotlight or two at the front of the house. The result looks uniform but not designed. It lacks the contrast, depth, and intentionality that make professional lighting look professional.
Good landscape lighting design starts with studying the property, identifying focal points, choosing the right technique for each area, and creating a plan where every fixture has a purpose. That design process is where most of the value lives, and it is the one thing a box from the store cannot give you.
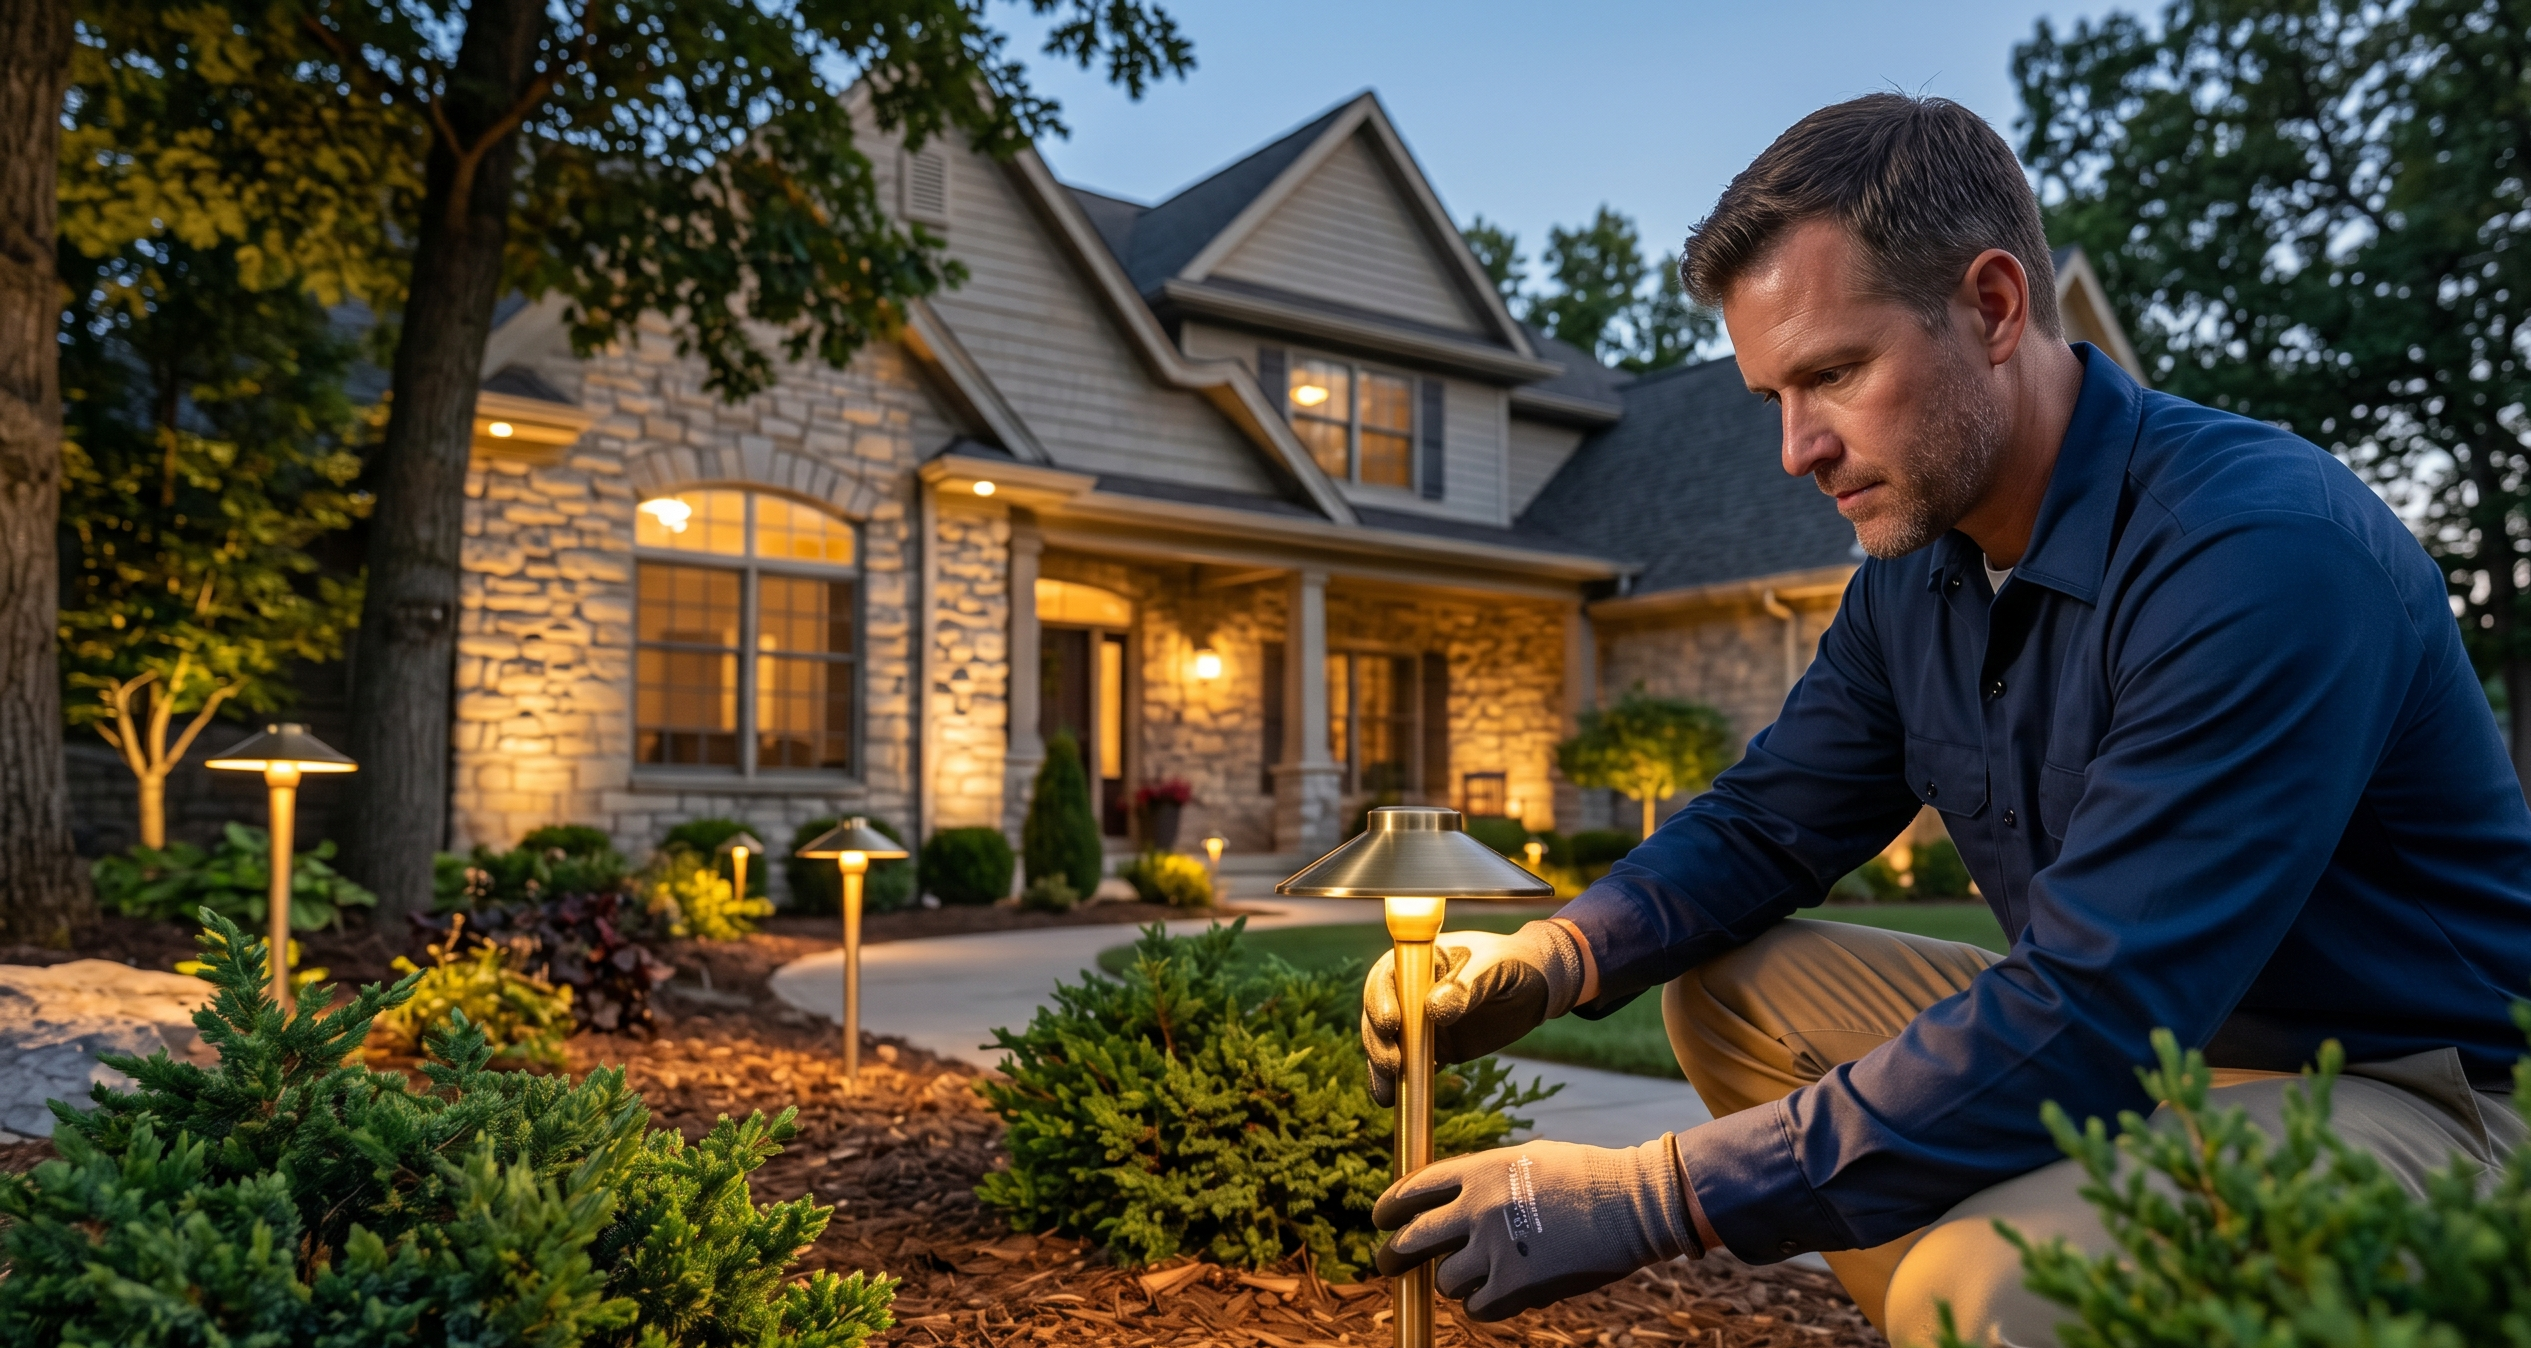
Fixture Quality
There is a significant gap between retail grade fixtures and professional grade fixtures. It is not just about how they look on day one. It is about how they hold up over time.
Retail fixtures use materials that are adequate for mild climates but struggle in places like Indiana where the weather cycles through extremes every year. Plastic lenses fog, yellow, or crack. Thin metal housings corrode at the seams. Rubber seals degrade and let moisture inside, which kills the LED.
Professional grade fixtures are built from solid brass, copper, or heavy duty cast aluminum. They are sealed against moisture intrusion, rated for burial or submersion, and backed by manufacturer warranties that last a lifetime. They cost more per unit, but they do not need replacing every couple of years.
Voltage Management
This is the technical issue that catches most DIY installers off guard. In a low voltage lighting system, the voltage at each fixture depends on how far it is from the transformer and how many other fixtures share the same wire run.
If you run too many fixtures on a single cable or stretch the cable too far, the fixtures at the end of the line get less voltage. They appear noticeably dimmer than the ones close to the transformer. This is called voltage drop, and it makes an otherwise decent installation look uneven and unprofessional.
Professional installers design the wiring layout to distribute voltage evenly across every fixture. They use hub and spoke configurations, heavier gauge wire, and multi-tap transformers to make sure every light in the system burns at the same brightness. This is something you learn through experience and training, not from the instruction sheet in a box.
Nighttime Calibration
Here is something most people do not think about: you cannot aim landscape lights during the day. You can get them roughly pointed in the right direction, but the only way to know if the angles, brightness, and overall composition look right is to see them at night.
Professional installers schedule a nighttime walkthrough after every installation. They turn the system on, walk the property with the homeowner, and adjust every fixture on the spot. Angles get tweaked. Brightness gets balanced. Hot spots and dark voids get corrected.
Most DIY installations skip this step because the homeowner finishes the project during the day and calls it done. Then they step outside that evening and realize half the lights are aimed wrong, but adjusting fixtures in the dark with a flashlight is not how anyone wants to spend their night.
The Cost Conversation
The most common reason people choose DIY is cost. A retail kit might run $150 to $400. A professional installation starts at a significantly higher number. On the surface, the math seems obvious.
But the comparison is not as straightforward as it looks.
A professional installation includes custom design, commercial grade fixtures with lifetime warranties, proper wiring with voltage management, a transformer sized for the system (with room to grow), professional installation with buried wiring, and nighttime calibration. That is not just lights in the ground. That is a complete system designed to look great and last for years.
A DIY kit includes the fixtures, a basic transformer, and some wire. Everything else, the design, the placement decisions, the voltage balancing, the nighttime adjustments, is on you. And if something breaks or fogs up in two years, the replacement cost starts to erode those initial savings.
When you compare the total cost of ownership over five to ten years (including replacements, electricity, and maintenance), the gap between DIY and professional narrows significantly. In many cases, the professional system ends up costing less per year of service.
When DIY Makes Sense
There are situations where DIY is a reasonable choice.
If you are renting and do not want to invest in a permanent system, a temporary DIY setup can add some ambiance to your outdoor space without a big commitment.
If you have a very small, simple area to light, like a short garden bed or a small section of walkway, and you do not need a cohesive design across your whole property, a kit can handle that.
If you enjoy the project itself and want to experiment with light placement and techniques before committing to a larger plan, DIY gives you a low-risk way to learn.
When Professional Is the Better Investment
For most homeowners who want a result that looks polished and lasts, professional installation is the better path. This is especially true if any of the following apply.
You want to light more than one area. Once you start combining facade lighting, tree lighting, pathway lighting, and backyard accents, the design complexity goes up fast. A professional makes sure everything works together as a unified plan.
You care about how it looks from the street. Curb appeal is where landscape lighting has the biggest impact, and it is also where mistakes are most visible. A professionally designed front-of-home lighting plan looks dramatically better than a DIY attempt.
You plan to stay in your home long term. A system built with quality fixtures and proper wiring will serve you for 15 to 20 years or more. That kind of longevity only comes from professional grade materials and installation.
You want to add to the system later. If you think you might want to expand into the backyard, add patio string lights, or light a water feature down the road, a professional can plan the transformer and wiring from day one to accommodate future phases.
You want it done right the first time. There is a real cost to doing a project twice. Homeowners who start with DIY and later hire a professional to redo it spend more in total than if they had gone professional from the start.
What the Process Looks Like With a Professional
Working with a lighting company is simpler than most people expect. At Serenity Outdoor Lighting, the process starts with a free on-site visit where we walk your property, talk about your goals, and take note of the features worth highlighting.
From there, we put together a custom design with a detailed proposal that shows you exactly what you are getting and what it costs. No surprises.
Installation typically takes a day for most residential projects. Wiring is buried, fixtures are placed, and the transformer is set up. Then we come back after dark to walk the property with you and dial everything in.
The system runs on a timer or photocell so it turns on and off automatically every night. And because every fixture comes with a lifetime warranty, you are covered if anything ever needs attention.
Make the Choice That Fits Your Home
There is no wrong answer here as long as you go in with realistic expectations. DIY can work for small, simple projects. Professional installation is the way to go for a result that looks custom, lasts for years, and adds real value to your home.
If you are leaning toward professional and want to see what a custom plan would look like for your property, request a free quote or contact us to schedule a walkthrough. No pressure, just an honest conversation about what your home needs.